From either the Menu Bar or the Tool Bar select a new image.
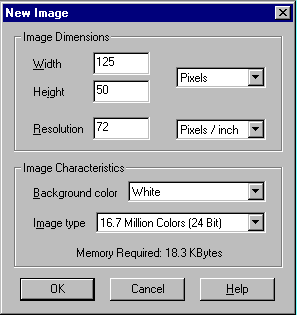
Set the width at 125 and the height at 50, background color set at white and 16.7 million colors. Click on the OK to select.
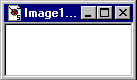
Step #2
Select the color you want the button to be from the color palette. I used a forground color of 0,248,108 and the background color of 0,155,128.
Select the Fill Tool (looks like a paint bucket). If the control box is not open on your screen you will need to activate it by selecting it on the Tool Bar.

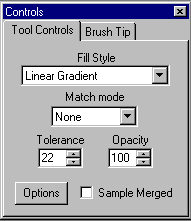
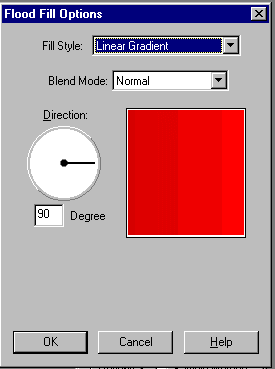
Select Fill Style to Linear Gradient Match Mode None. select Option.
Set the Blend Mode toNormal and the Direction to 90 degrees.
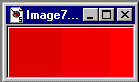
Place the Fill Tool inside the active Image and left click the mouse. Your Image should now appear like the one below (that is if you used the same colors as I did).
Step #3
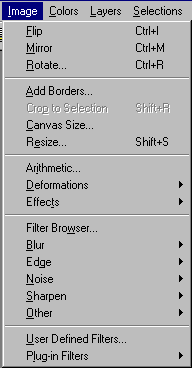
From the Menu Bar select Image, Effects, buttonize.
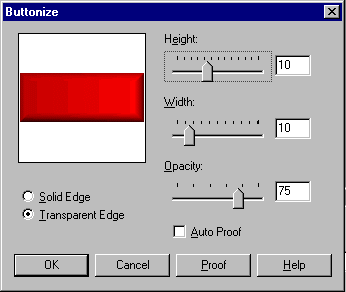
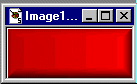
Set the width and height at 10 Opacity at 75 and select the radio button for Transparent Edge. Select ok, and this should be what you will get.
Now if you have the Filtere Set I referred to in the beginning yuo can go back and retrace you step right up to when you were to select the Buttonize function from the Tool Bar.
This time from the Menu Bar select Image, goto the Plug-in Filters and select the NVR BorderMania Color Push Button. Leave the default settigs as they are and say OK. Your new button should now look like this.

Now you can go back and experiment with the differnt settings on both the Paint Shop Pro tools and the plug-in filter. Have fun with all the new buttons you can now have for your page.
